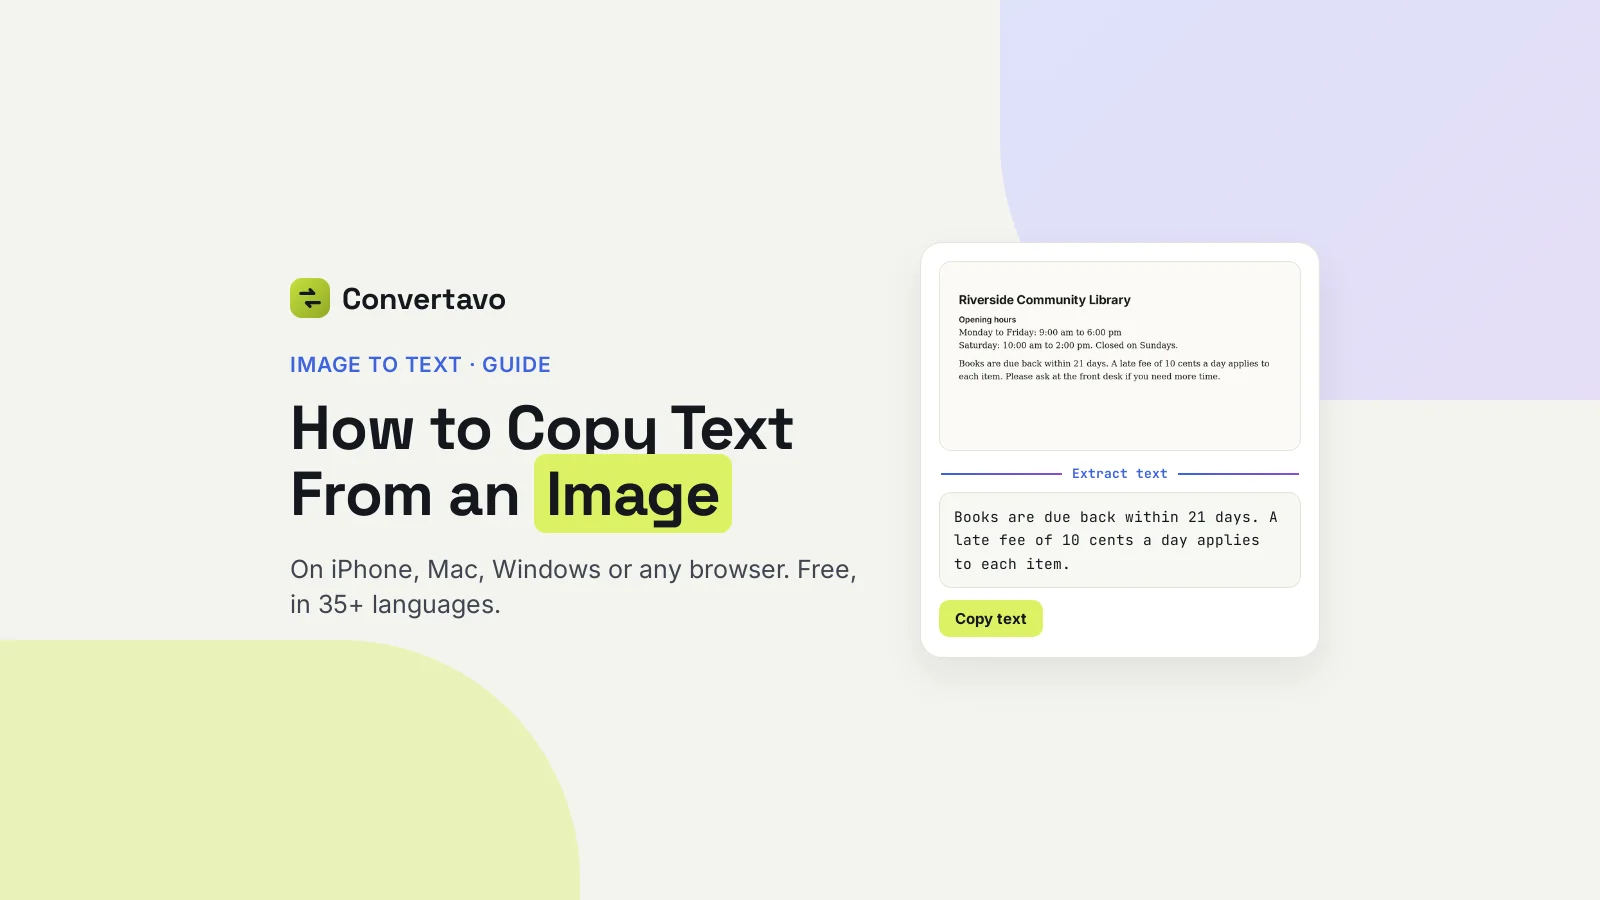
How to Copy Text From an Image
Copy text from any image in seconds: the built-in way on iPhone, Mac and Windows, a free reader for 35+ languages, and how to fix a bad result.
 Noman Mustafa Owner
- Published
- Updated
- Reading time10 min
On this page 26 sections
You have a picture with words in it. You want those words as text you can paste.
You don't have to type them out. Your phone and your computer can already read text inside a photo, and a free online reader handles everything they can't.
This guide shows how to copy text from an image with every method that works, which one to pick, and what to do when the text comes back wrong.
How to copy text from an image in five steps
This works on any device with a browser, and takes under a minute.
Add your picture. Open the image to text converter and click Choose files, paste a screenshot with Ctrl and V, or tap Take a photo on your phone. JPG, PNG, HEIC, WebP, TIFF, BMP, GIF and PDF all work, up to 25 MB free.
Set the language. Auto-detect works out the script on its own. Choosing it yourself still helps a lot for Urdu, Arabic and Chinese. If the picture mixes two languages, set the second one as well.
Pick the image mode. Printed document, Screenshot, Photo of a page, Handwriting, Sign or sparse text, Single line, or Math formula. This one choice changes the result more than people expect.
Click Extract text. It usually takes 5 to 15 seconds. The words come back in an editor, not a dead block, so you can fix anything on the spot.
Copy it, or save it as a file. You can take plain text, a Word file, a searchable PDF, Markdown or JSON. Word keeps the uncertain words highlighted for checking.
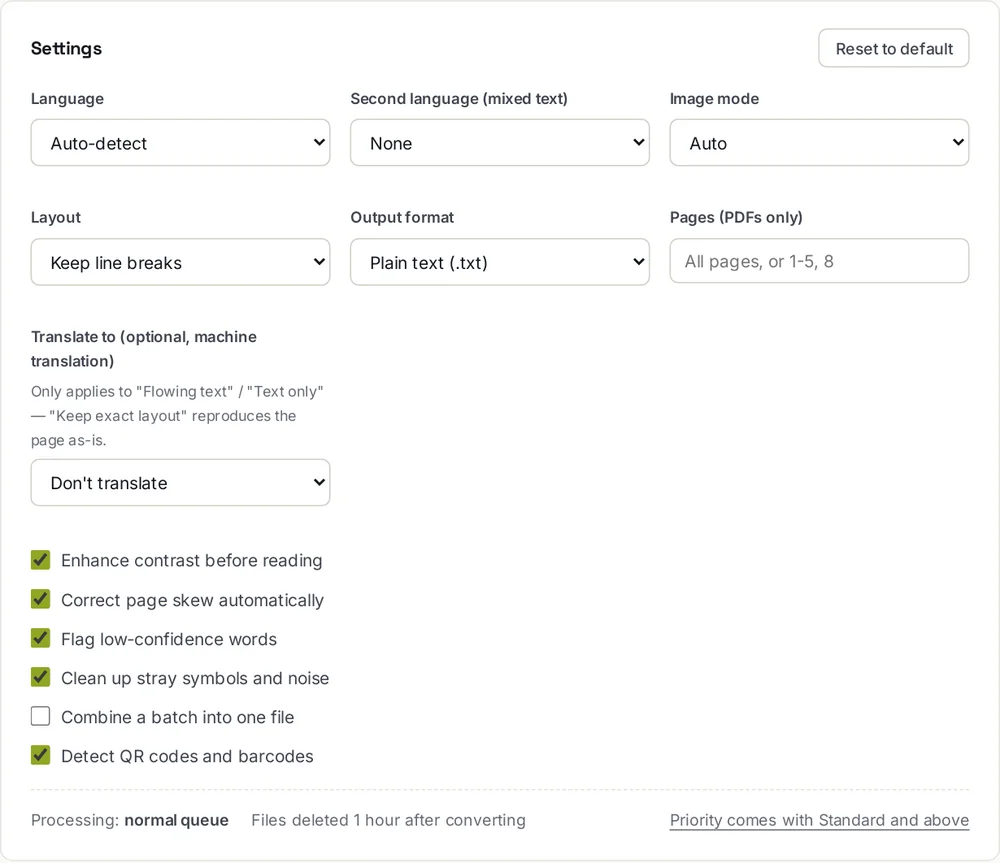
Steps 2 and 3: the language and the image mode sit at the top of the settings.
One setting is worth turning on every time: Flag low-confidence words. It marks anything the reader was unsure about, so you know exactly what to check instead of rereading the whole page.
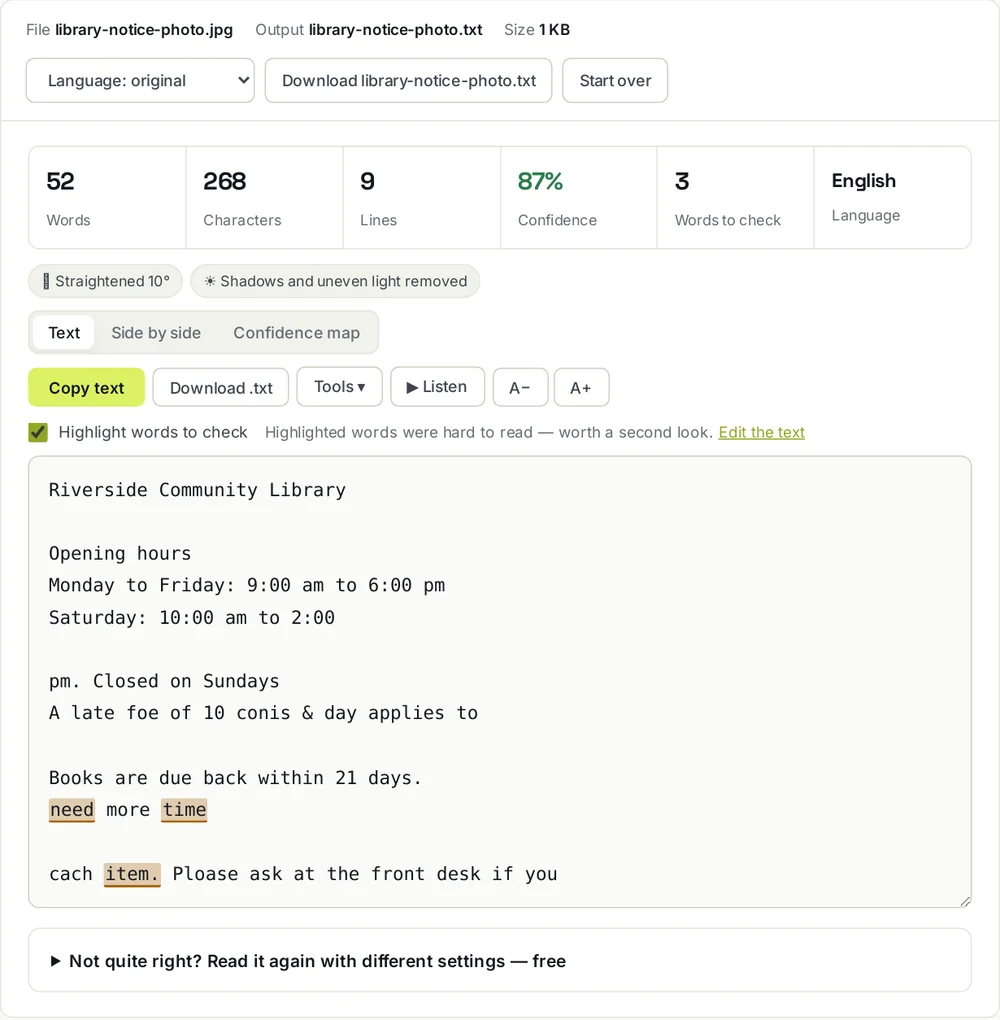
A real result from a tilted phone photo. The three highlighted words are the ones to check.
Every way to do it, side by side
Seven methods, all free. The real differences are where they run and what you get at the end.
Method | Works on | Best for | Picture leaves your device? | Save as a file? |
|---|---|---|---|---|
Convertavo Image to Text | Any device | Photos, scans, PDFs, handwriting, 35+ languages | Yes, deleted after one hour | Yes: text, Word, searchable PDF, Markdown, JSON |
Convertavo Read on this device | Any browser | A document that must not be uploaded | No | Copy the text |
Live Text | Mac, iPhone, iPad | Copying words straight out of a photo | No | No |
Snipping Tool | Windows 11 | Text sitting on your screen right now | No | No, clipboard only |
PowerToys Text Extractor | Windows 10 and 11 | Text you cannot select, even inside a video | No | No, clipboard only |
Google Docs, through Drive | Any device | Long scanned pages and old documents | Yes | Yes, a Google Doc |
Google Lens | Android, iPhone, Chrome | Handwriting, street signs, unusual scripts | Yes | No |
That fourth column is the one other guides skip. For an ID card, a payslip or a contract, start with a row that says no.
And one method you will see elsewhere: typing it out by hand. That is fine for a single phone number. For anything longer it is the thing you came here to avoid.
The exact steps for your situation
Pick the one you are holding.
On an iPhone or iPad
Open the photo in the Photos app. Press and hold on the words until the selection handles appear, then drag and tap Copy. There is also a small Live Text button in the corner that highlights everything it can read. Apple says Live Text is not available in every region or language, so check if your language is unusual.
On a Mac
Open the image in Preview, drag to select the words, then Control-click the selection and choose Copy Text. If nothing selects, choose Tools, then Text Selection, and try again.
On Windows
Press Windows, Shift and S to capture part of the screen, then use the text action on the capture. That is built into Windows 11. For text anywhere on screen, including inside a video, install the free PowerToys and press Windows, Shift and T. The text lands on your clipboard.
From a screenshot
Screenshots are the easiest images to copy text from, because the text is sharp and evenly lit. You don't need to save the file first. Copy it, open the tool and press Ctrl and V. Dark mode screenshots are fine too, since light text on a dark background is inverted automatically before reading.
From a photo of a book page or a printed document
Lay the page flat and shoot from directly above, not at an angle. Fill the frame with the text and keep your own shadow off the page. Set the image mode to Photo of a page, and leave Enhance contrast and Correct page skew switched on.
From handwritten notes
Switch the image mode to Handwriting. Clear block capitals and neat joined-up writing come out well. Rushed scribbles do not, so turn on Flag low-confidence words and check whatever it marks.
From Urdu, Arabic, Hindi or another script
Set the language yourself instead of leaving it on auto-detect. That makes a real difference for right-to-left scripts such as Urdu and Arabic, and for Chinese. If the page mixes Urdu with English, set English as the second language.
From a whole scanned document
One page is fine here. A multi-page scan belongs in PDF OCR, which hands back the same PDF with a text layer underneath. If the picture is a table, send it to Image to Excel so the rows and columns survive. For a sheet you keep in Google Sheets, follow how to get a table from a picture into Google Sheets.
Is it free, and is it safe?
Yes to both. Here are the plain numbers.
Is it free?
You get 20 credits a day with no account, no email address and no card. Reading one image costs 3 credits, so that is six files a day at no cost. Nothing comes back with a watermark, and files up to 25 MB need no signup. A free account raises it to 50 credits a day and 100 MB per file.
What happens to my image?
It is uploaded, read, and then deleted from the servers one hour later, automatically. Nothing is read by a person and nothing is reused to train anything. Every upload and download runs over HTTPS.
What if I don't want it uploaded at all?
Use Read on this device, further down the tool page. Your own browser does the reading, so the picture never reaches any server and no credits are used. It reads images only, not PDFs, and it is slightly less accurate, because the main reader cleans and straightens the picture first.
That trade is worth knowing. For a bank statement or an ID card, slightly less accurate on your own device beats perfect on someone else's.
If the result is wrong, does a second try cost more?
No. There is a re-read option under the result, and the same file can be read again up to five times at no extra cost. Change the language or the image mode and run it again.
Five rules that decide if it works
The picture matters far more than the tool. These rules come from the Tesseract documentation, the open source engine behind a lot of free OCR.
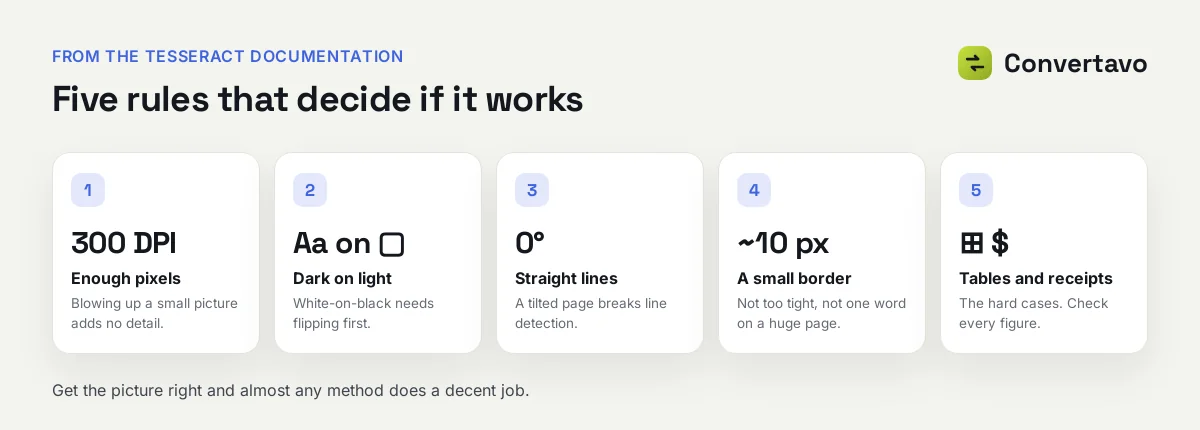
The five rules on one card.
1. Aim for 300 DPI
Tesseract works best on images of at least 300 DPI. In plain words, the letters need enough pixels to have a shape. That is why a scan beats a quick phone snap nearly every time.
Blowing a small picture up does not help. Enlarging adds no new detail, it only makes the same blur bigger.
2. Dark letters on a light background
Tesseract 4 and later expect dark text on a pale page. A dark mode screenshot is the exact opposite, which is why white-on-black often reads as nonsense in other tools.
Good readers flip it for you before reading. If you are using something that doesn't, invert the colours yourself first.
3. Straight lines, not tilted ones
OCR splits the page into lines before it reads a single letter. The documentation warns that line detection gets much worse when a page is skewed. A tilted photo can ruin an otherwise sharp image.
Shoot flat from above. Leaving Correct page skew switched on handles a small lean, but it cannot rescue a photo taken from the side.
4. Leave a small border
The documentation suggests about 10 pixels of space around the text. Text cropped with no border at all can give the reader trouble, and adding a thin white edge helps.
Too much empty space hurts as well. One small word on a huge background can come back as an empty page. Crop to the text, plus a little air.
5. Tables and receipts are the hard cases
Two known weak spots. Tables need special layout handling, so columns often come back as one jumbled run of words. And these engines are tuned for ordinary sentences, so receipts, price lists and codes read worse than paragraphs do.
That is not a flaw in any one tool. It is why a table belongs in Image to Excel, and why you check every figure on a receipt yourself.
Most guides skip all five. Get the picture right and almost any method above will do a decent job.
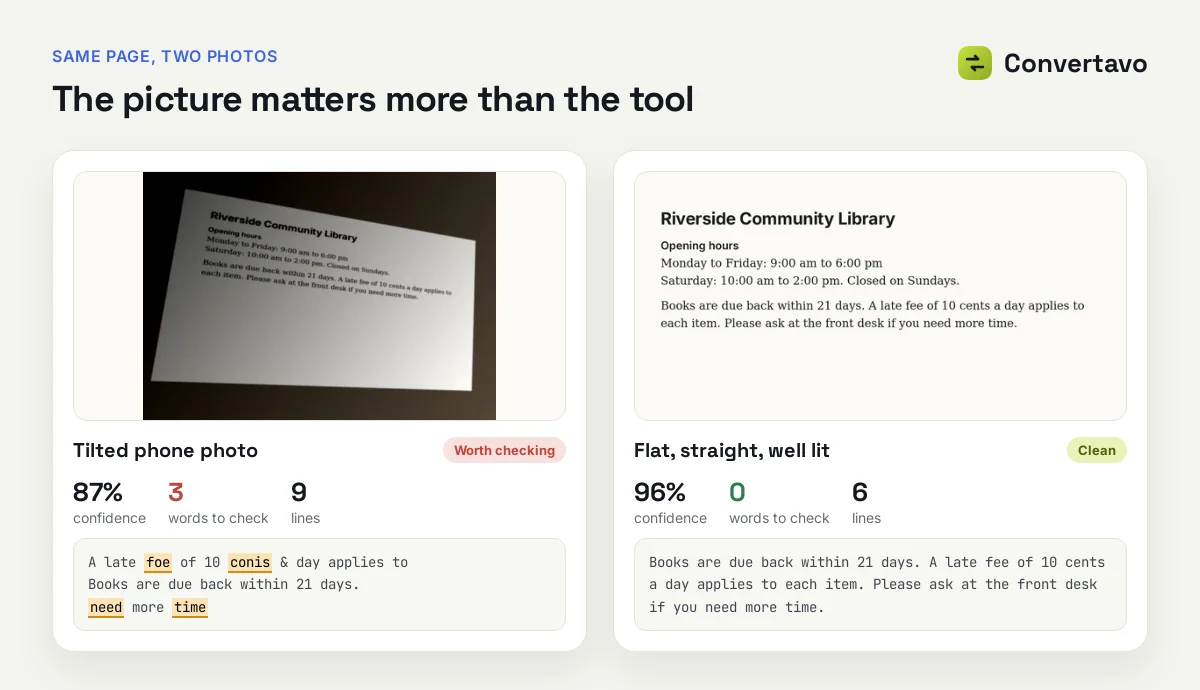
Same page, same tool. The tilted photo broke rule 3. The flat scan came back word perfect.
Why did the text come out wrong?
Nearly every bad result is one of these nine. Find yours and the fix takes seconds.
What you got | Why it happened | What to do |
|---|---|---|
Nonsense letters and symbols | The photo is blurry, or the language is wrong | Tap to focus and retake it, or set the language by hand |
Urdu or Arabic came out scrambled | Auto-detect picked the wrong script | Choose Urdu or Arabic yourself instead of auto |
The last lines are missing | The text ran past the edge of the frame | Reframe so every line sits inside the picture |
Numbers are wrong | Low contrast or very small type | Move closer, or scan instead of photographing |
The text is slanted and jumbled | The photo was taken at an angle | Shoot straight down onto a flat page |
Handwriting read badly | Image mode was left on Auto | Switch image mode to Handwriting and print the letters |
Line breaks land in odd places | Layout is set to keep them | Change Layout to Merge into paragraphs |
A table became a jumble of words | Wrong tool for the job | Send it to Image to Excel, which keeps rows and columns |
Nothing was found at all | The text is tiny, decorative or scattered | Re-read as Sign or sparse text, or take a closer photo |
If two apply at once, fix the picture first and the language second. Those two solve most bad results, and the re-read is free.
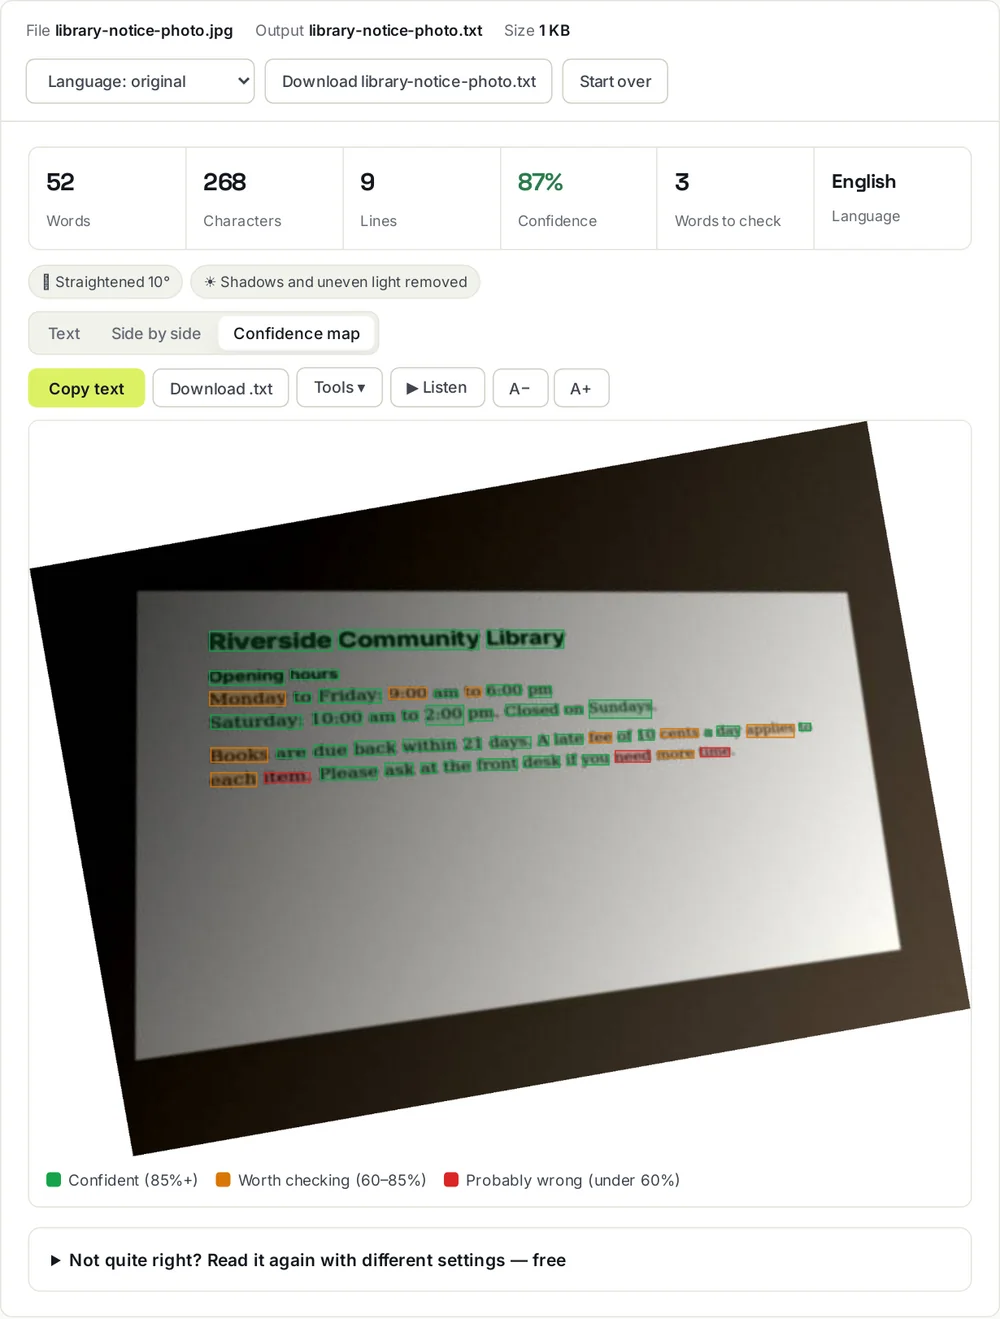
The confidence map shows the same thing over your picture: green is safe, orange is worth checking, red is probably wrong.
Other free tools that help
Image to Excel keeps rows and columns when the picture is a table.
PDF OCR is built for multi-page scans and gives the PDF back with a text layer underneath.
HEIC to JPG is handy when another app refuses your iPhone photos.
Need the pages themselves for a form, not the words? Scan documents with your phone into one PDF.
Try it on the picture you have open
Take the image you were about to retype, drop it into the free Convertavo image to text reader, and set the language before you press Extract text. If something looks off, change the image mode and read it again, which costs nothing. Six files a day are free, with no account and no watermark. That is how to copy text from an image without typing a word.
Sources
Improving the quality of the output, Tesseract documentation, for 300 DPI, dark text on a light background, skew, borders, tables and dictionaries.
Text Extractor utility, Microsoft Learn, for the Windows, Shift and T shortcut and the clipboard behaviour.
Interact with text in a photo using Live Text in Preview, Apple, for the Copy Text steps and the note on regions and languages.
Image to Text converter, Convertavo, read 22 October 2026, for the formats, languages, image modes, output types, credits, limits and the private mode behaviour.
Frequently asked questions
How do I copy text from an image for free?
Upload it to an online reader, or use the feature already on your device. Mac and iPhone have Live Text. Windows 11 has the Snipping Tool. None of them costs anything.
Can I copy text from a picture without uploading it?
Yes. Open Read on this device and your own browser does the work, so nothing is uploaded. Live Text, Snipping Tool and PowerToys also run on your own machine.
How do I copy text from a photo on my phone?
On an iPhone, open the photo, press and hold on the words, then tap Copy. On Android, open the picture in Google Lens and tap the text icon. Both are built in and free.
Can these tools read handwriting?
Yes, with the image mode set to Handwriting. Neat block capitals read well, rushed scribbles do not. Turn on the low-confidence flags and check whatever gets marked.
Which languages can I use?
More than 35, including Urdu, Arabic, Persian, Hindi, Bengali, Punjabi, Chinese, Japanese and Russian. Set the language yourself for right-to-left scripts, and add a second language for mixed pages.
Why is the copied text full of mistakes?
Usually the picture, not the tool. Small, blurry, tilted or low-contrast images cause most errors. Move closer, shoot flat, and read it again with the right image mode.
Try it on your own file
Free, no signup, and your file is deleted an hour later.
Noman Mustafa — Founder of Convertavo I build the file tools on this site. Fifteen years of writing software, and most of my days now go into making PDF, image and OCR processing fast enough to run in a browser tab. I write here about what I learn breaking files apart.