Why Does Instagram Make Your Photos Blurry?
Instagram blurs photos because it resizes and re-compresses them. Post at the size it wants, from your original, and there is nothing left to ruin.
 Noman Mustafa Owner
- Published
- Updated
- Reading time8 min
On this page 16 sections
Your photo looks sharp in your gallery. You post it, and Instagram turns it into one of those blurry photos: soft, grainy or blocky.
Your camera is fine. Instagram resizes and re-compresses every photo you upload, and the more work it has to do, the worse your picture looks.
So give it a photo that already matches its size, and there is almost nothing left for it to ruin. That takes about fifteen seconds in the free Convertavo image resizer.
How to upload a sharp photo to Instagram
Five steps, and the whole thing takes under a minute.
Start from the original photo. Use the file in your gallery, not a copy you saved back off Instagram or received on WhatsApp. Those copies have already been squeezed once, and posting them squeezes them twice.
Pick the size that matches the post. Open the image resizer, click Choose images, and tap Instagram post (1080 by 1080) or Story / Reel (1080 by 1920) under Quick sizes. For a portrait post, set Resize by to Popular size and pick Instagram · Portrait post, 1080 by 1350. A YouTube thumbnail preset is there too, at 1280 by 720.
Set the mode to Fill and crop. This fills the frame completely, so the app has no reason to crop or stretch anything itself. Check the crop frame in the live preview so nobody loses their head.
Tick Sharpen after resizing. Shrinking always softens a picture a little, and this puts the edges back. Leave Resampling on Lanczos, which is the right one for photos.
Download, then upload on wifi. It takes 3 to 8 seconds. Post the new file on a stable connection, because a weak signal makes some apps compress harder.
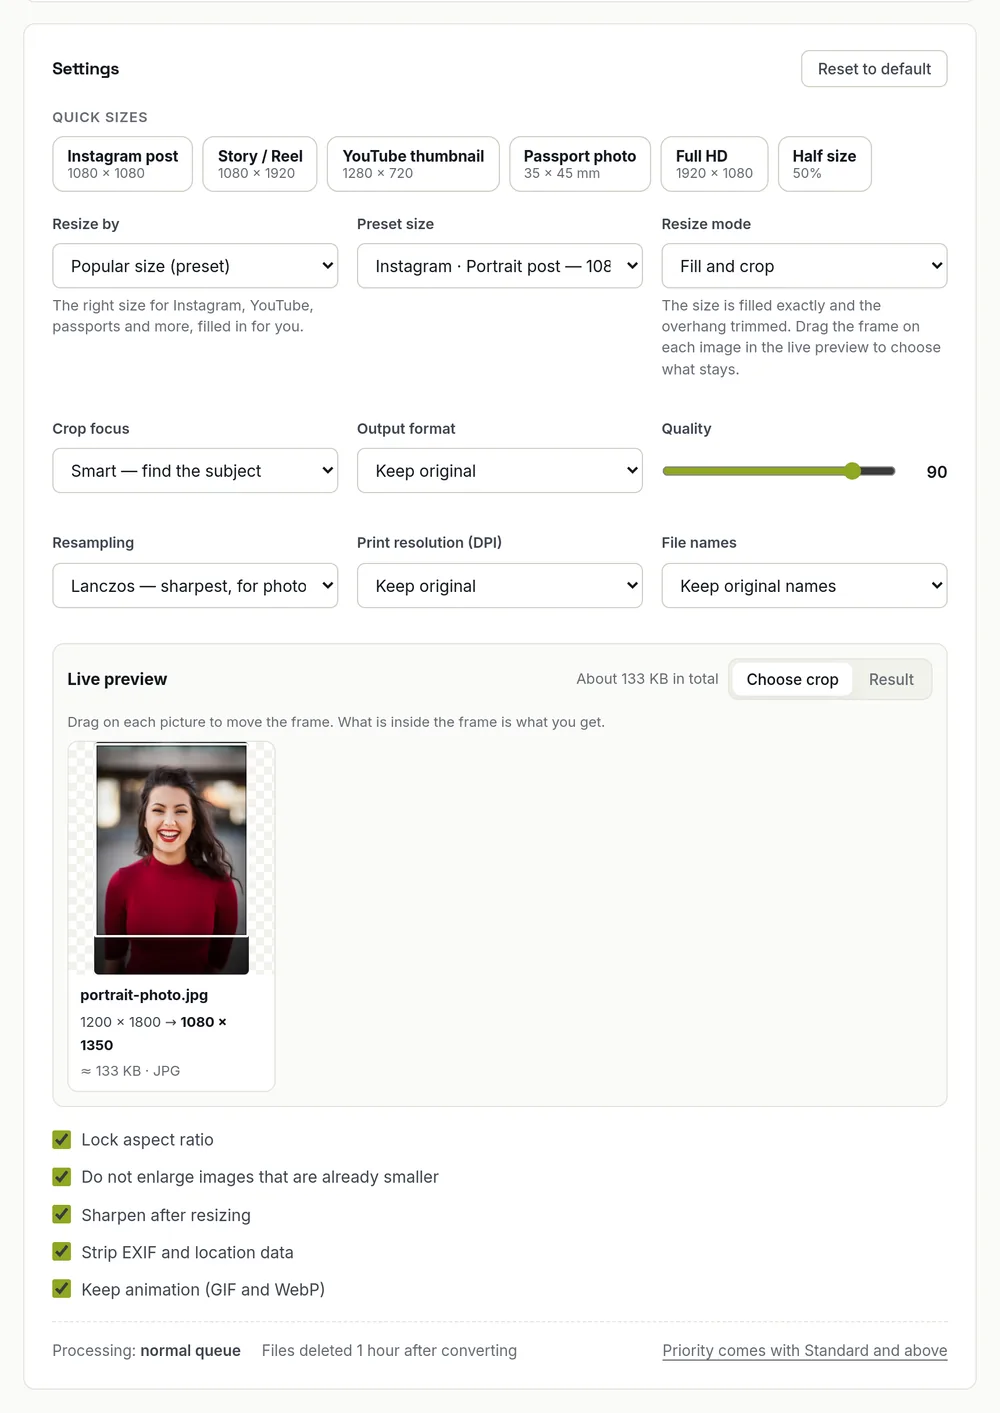
Steps 2 to 4: the portrait preset, Fill and crop, and Sharpen after resizing.
That is it. The photo now matches what Instagram wanted, so it does the least possible work to your picture.
What size should a photo be before you post it?
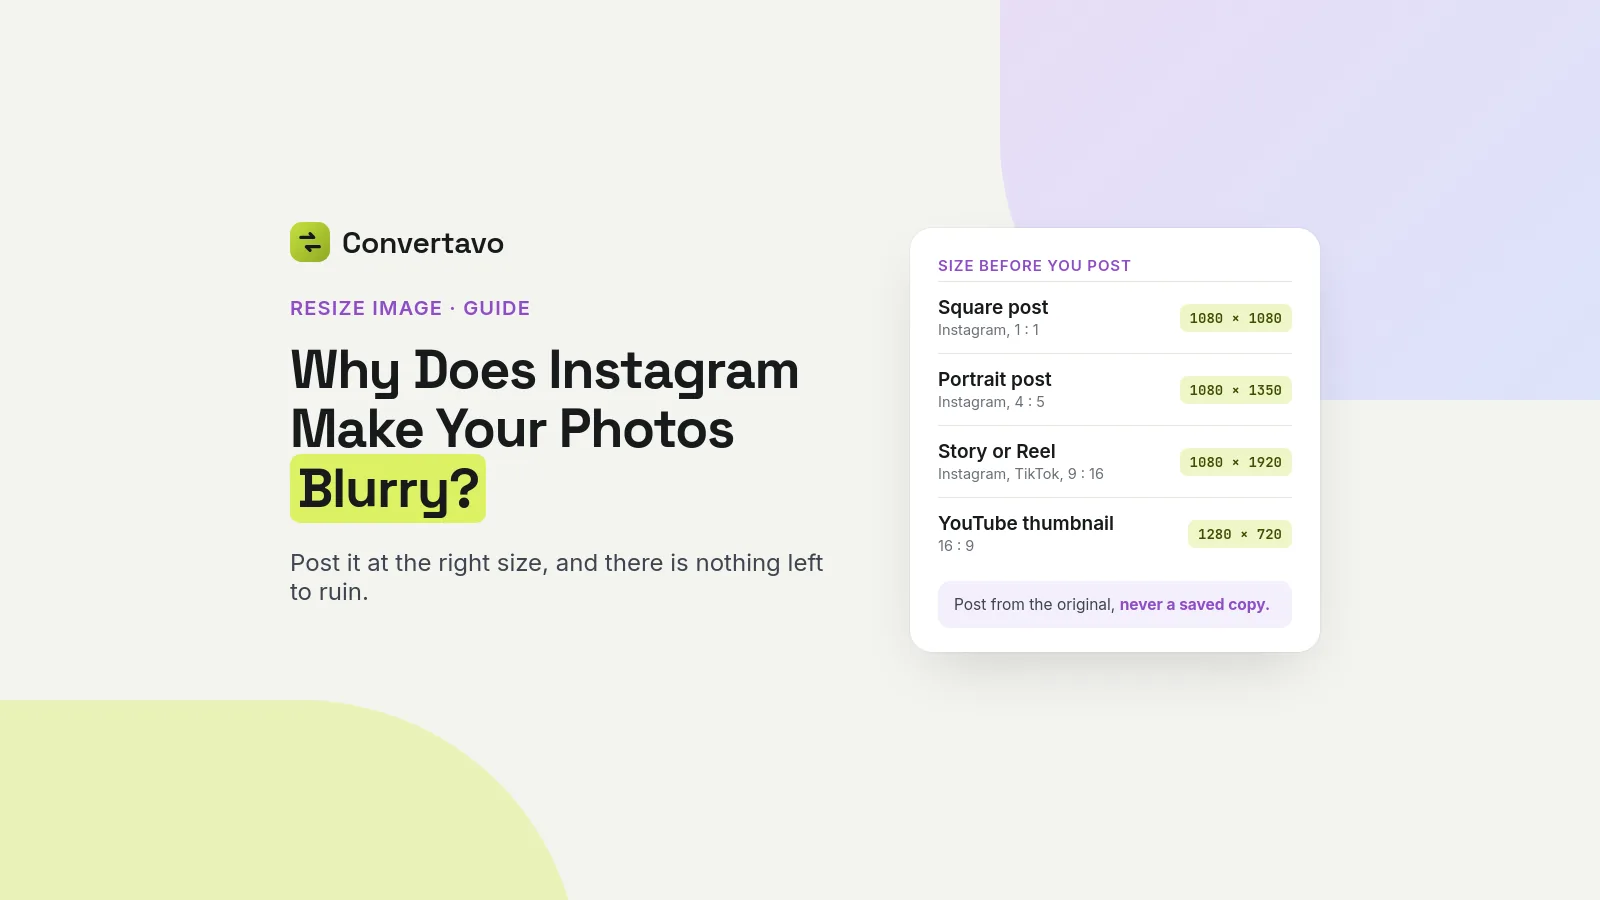
1080 pixels on the short side covers almost everything on Instagram. Here is the full list, so you can stop looking it up.
Where it goes | Size in pixels | Shape | Mode to use |
|---|---|---|---|
Instagram square post | 1080 × 1080 | 1 to 1 | Fill and crop |
Instagram portrait post | 1080 × 1350 | 4 to 5 | Fill and crop |
Instagram or TikTok story, Reel | 1080 × 1920 | 9 to 16 | Pad, with a blurred fill |
YouTube thumbnail | 1280 × 720 | 16 to 9 | Fill and crop |
Facebook or LinkedIn link post | 1200 × 630 (LinkedIn 1200 × 627) | Wide | Fill and crop |
WhatsApp profile picture | 500 × 500 | Square | Fill and crop |
Full HD wallpaper or slide | 1920 × 1080 | 16 to 9 | Fit inside |
Website hero image | 1600 to 2000 wide | Any | Longest side |
Passport photo | 413 × 531 | 35 × 45 mm | Print size at 300 DPI |
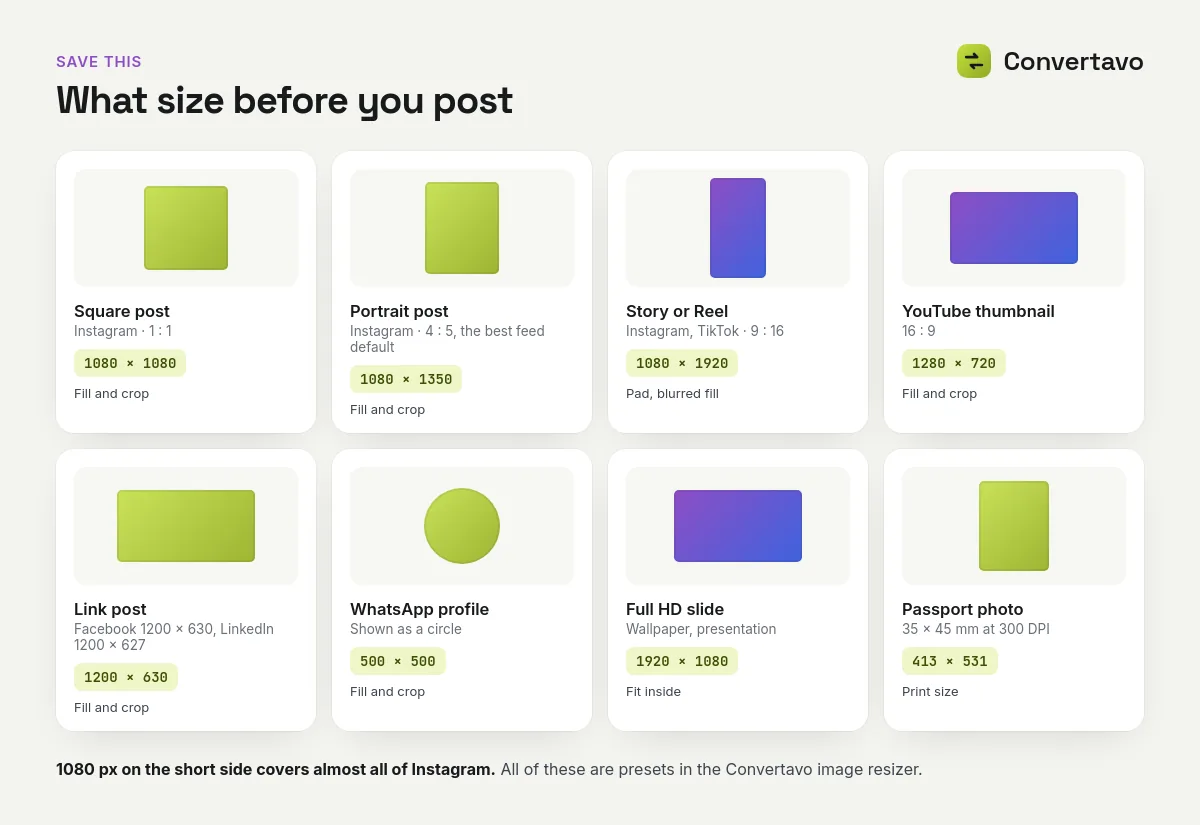
The same list as a picture you can save.
Two things worth knowing from that table.
The portrait post at 1080 by 1350 takes up more of someone's screen than a square does, so it is the better default for a feed post. And a landscape photo in a story should be padded with a blurred copy of itself, not stretched. That blurred strip look is a choice, not an accident.
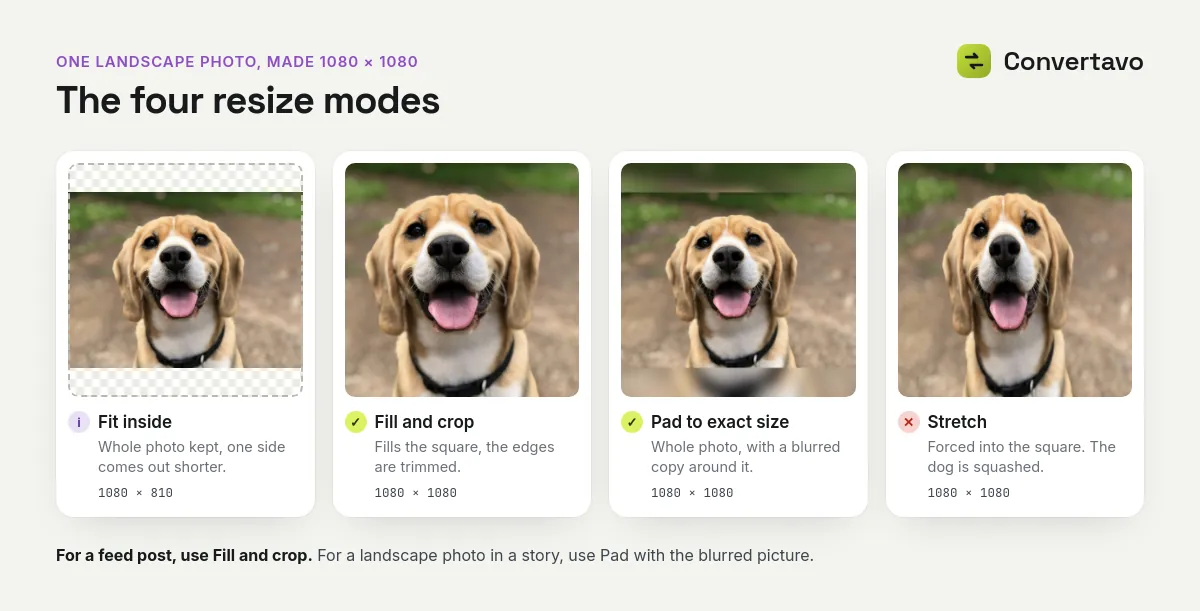
The four resize modes on the same photo. Only Stretch distorts it.
There are 26 presets in the tool, including X, Pinterest, a YouTube channel banner, 4K and an A4 page at 300 DPI. You do not need to memorise any of them.
The same problem on other apps
Every app that hosts your photos re-compresses them. Only the details change.
Why is my Instagram story blurry?
Because a story is a tall 9 by 16 frame and most photos are not. Instagram has to stretch or crop yours to fit, and that is what makes story photos blurry. Resize to 1080 by 1920 first, and use Pad with a blurred fill if the photo is landscape.
Why does WhatsApp lower photo quality?
Because WhatsApp re-saves anything sent as a photo so it travels faster. Send the file as a document instead and the original arrives untouched. That is the trick for sending a client a proper copy.
Why is my YouTube thumbnail fuzzy?
Usually because the picture was smaller than 1280 by 720 to begin with, so it had to be enlarged. Enlarging cannot invent detail that the camera never recorded. Start from a bigger original, resize down to 1280 by 720, and never up.
Why does my profile picture look worse than the photo?
Because a profile picture is shown small and square, and the app crops the middle out of your photo. Crop it yourself first with Crop Image, then resize it square. You decide what stays in frame instead of the app.
Is the resizer free, and do my photos stay private?
Yes to both, and you do not have to upload anything at all. Here are the real numbers.
Free. You get 20 credits a day and each image costs 1 credit, so that is 20 photos a day. No email address, no card and no watermark. Paid plans add credits, bigger files and faster processing, and they do not unlock features or raise the output quality.
Limits. Files up to 25 MB without an account, or 100 MB with a free one. Three images per batch signed out, ten with a free account. JPG, PNG, WebP, HEIC, AVIF, GIF, BMP and TIFF all go in.
Private. Uploads are deleted one hour after processing, nothing is stored or read by anyone, and every transfer runs over HTTPS.
Nothing uploaded at all. Open Resize on this device and your browser does the work, with no upload and no credits used. It handles exact pixel sizes and the four modes, and the presets and print sizes need the main resizer.
Location data. Strip EXIF and location data is on from the start. A photo you post then carries no record of the address it was taken at.
The three rules nobody tells you
These explain almost every blurry photo on Instagram, and none of the pages ranking for this question mention them.
Rule one: never post a photo twice
Every upload squeezes your picture, and the damage stacks. Save a post back off Instagram, then post it again, and that photo has now been squeezed twice. Share it on WhatsApp first and it is three times.
So keep one folder of originals on your phone or computer. Every version you make comes from that folder, never from a version you already made.
Rule two: making a photo smaller is safe, making it bigger is not
Shrinking a picture averages pixels together, which is why a little sharpening afterwards brings the edges straight back. Enlarging is a different thing. The detail was never captured, so the software can only guess at the new pixels, and the result looks soft no matter which tool you use.
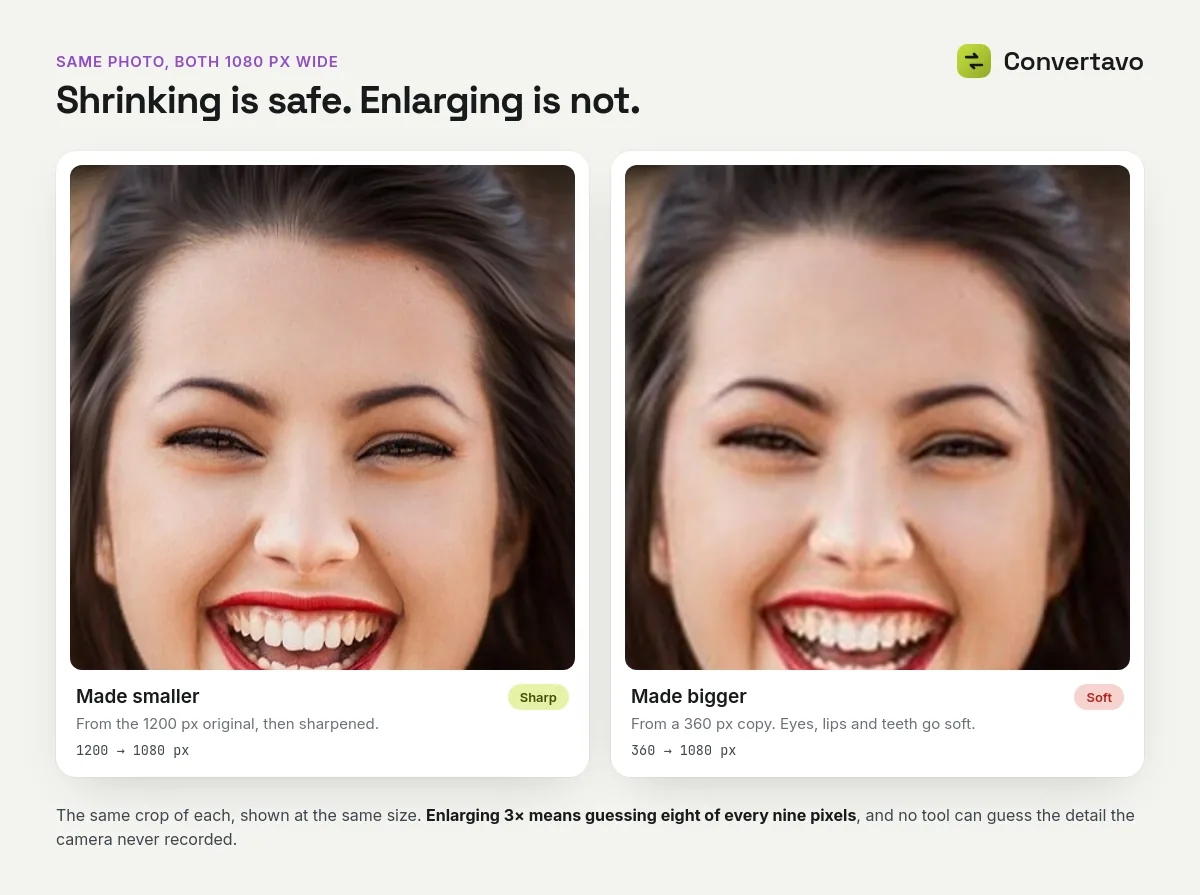
Both are 1080 pixels wide. Only one had the detail to begin with.
This is why a 600 pixel picture will always look poor as a 1280 by 720 thumbnail. If you are resizing a whole folder, leave Do not enlarge images that are already smaller switched on.
Rule three: for a KB limit, resize first and compress second
This one saves people hours. A phone photo is about 4000 pixels wide, and a 200 KB file cannot hold that many pixels well. Squeeze all 4000 into 200 KB and the picture goes blocky and smeared.
Bring the same photo down to around 1200 pixels wide first, and those same 200 KB look clean, because there are far fewer pixels to store. Resize first, then use Compress Image if you still need the file smaller.
What cannot be undone
Cropping, compressing and shrinking are all one way. Once part of the picture is cut off, or the detail is thrown away, no tool brings it back honestly. Anything that claims otherwise is guessing at pixels and hoping you do not zoom in.
That is the real reason to keep your originals. It costs nothing and it is the only insurance there is.
Why does my photo still look wrong?
Almost every case is one of these eight. Find yours and the fix is one setting away.
What you are seeing | Why it happens | What to do |
|---|---|---|
The photo looks squashed | The mode was Stretch, or the ratio lock was off | Turn on Lock aspect ratio and use Fit inside or Fill and crop |
Someone's head is cut off | The app cropped to its own shape, not yours | Resize to 1080 by 1350 and set the crop frame yourself |
A story has white bars down the sides | Fit inside left empty space | Use Pad to exact size with the blurred fill |
Still blurry even after resizing | You started from a copy that was already squeezed once | Go back to the original file in your gallery |
An enlarged photo looks soft | There was no detail to enlarge | Start from a bigger original. No tool can add it back |
iPhone photos look worse than the rest | HEIC files get converted on upload | Convert first with HEIC to JPG |
Text or a logo in the picture looks fuzzy | Compression hits sharp edges hardest | Use PNG where the app allows it |
The upload takes ages and looks bad | A PNG of a photo is very heavy | Save photos as JPG and keep PNG for graphics |
If you are unsure whether a change is visible, zoom to 100% before you post. That is where softness shows first, and nobody ever checks.
Other free tools for the same job
Crop Image decides what stays in the frame before the app decides for you.
Compress Image shrinks the file when the pixel size is already right.
HEIC to JPG turns iPhone photos into a format every app handles the same way.
Try it on your next post
Take the photo that came out badly, resize the image to 1080 by 1350 with Fill and crop, and post it again from the new file. Compare the two on your phone. Twenty photos a day free, with no account and no watermark.
Frequently asked questions
Why does Instagram make my photos blurry?
Because it resizes and re-compresses every photo you upload. The further your picture is from the size it wants, the more work it does and the softer the result looks.
What size should an Instagram photo be?
1080 by 1080 for a square post, 1080 by 1350 for a portrait post, and 1080 by 1920 for a story or Reel. The portrait size fills more of the screen, so it is the better default.
Does resizing a photo make it blurry?
Making it smaller loses a little fine detail, and sharpening puts the edges back. Making it bigger always looks soft, because the detail was never there to start with.
How do I stop WhatsApp from lowering the quality?
Send the picture as a document rather than as a photo. The file then arrives exactly as you sent it.
Why do my photos look worse every time I repost them?
Because each upload compresses the picture again and the damage adds up. Always post from your original file, never from a copy you saved back off an app.
Is it better to resize or to compress?
Resize first if the pixel size is bigger than the place it is going. Compress if the pixel size is already right and only the file is too heavy.
Can I resize several photos at once?
Yes. Add a few images or a whole folder, three at a time without an account and ten with a free one. The same settings apply to all of them.
Try it on your own file
Free, no signup, and your file is deleted an hour later.
Noman Mustafa — Founder of Convertavo I build the file tools on this site. Fifteen years of writing software, and most of my days now go into making PDF, image and OCR processing fast enough to run in a browser tab. I write here about what I learn breaking files apart.