Why Is My Transparent PNG Showing a White Background?
Your transparent PNG looks fine on your computer and white everywhere else. Here is where transparency breaks, which formats keep it, and the fix.
 Noman Mustafa Owner
- Published
- Updated
- Reading time8 min
On this page 14 sections
Your cut-out looks perfect on your computer. You put it in a document or send it to a client, and a white box appears around it.
Your transparent PNG is usually fine, and the white background comes from the place you put it. Almost every app throws transparency away quietly.
This guide shows you where transparency breaks, which formats keep it, and how to make a clean cut-out in under a minute with the free Convertavo background remover.
How to save an image with a transparent background
Five steps, and the whole thing takes under a minute.
Upload your photo. Open the background remover and click Upload image, drop the file in, paste it with Ctrl and V, or use a link. JPG, PNG and WebP are accepted, up to 25 MB.
Set Output to Transparent PNG. This single choice decides everything that follows. White background and Custom colour are there too, and both give you a solid backdrop instead of a see-through one.
Choose the right edge setting. Standard suits most photos and is the quickest. Soft (hair and fur) keeps loose strands, and Sharp (products) gives clean lines on boxes, bottles and electronics.
Click Remove background. It usually takes 8 to 20 seconds, and the cut-out comes back at the same size as your photo, not as a small preview.
Download the file. Do not screenshot it. Use Download PNG. A screenshot of the checkerboard saves the checkerboard, because a screenshot is flat and cannot hold transparency.
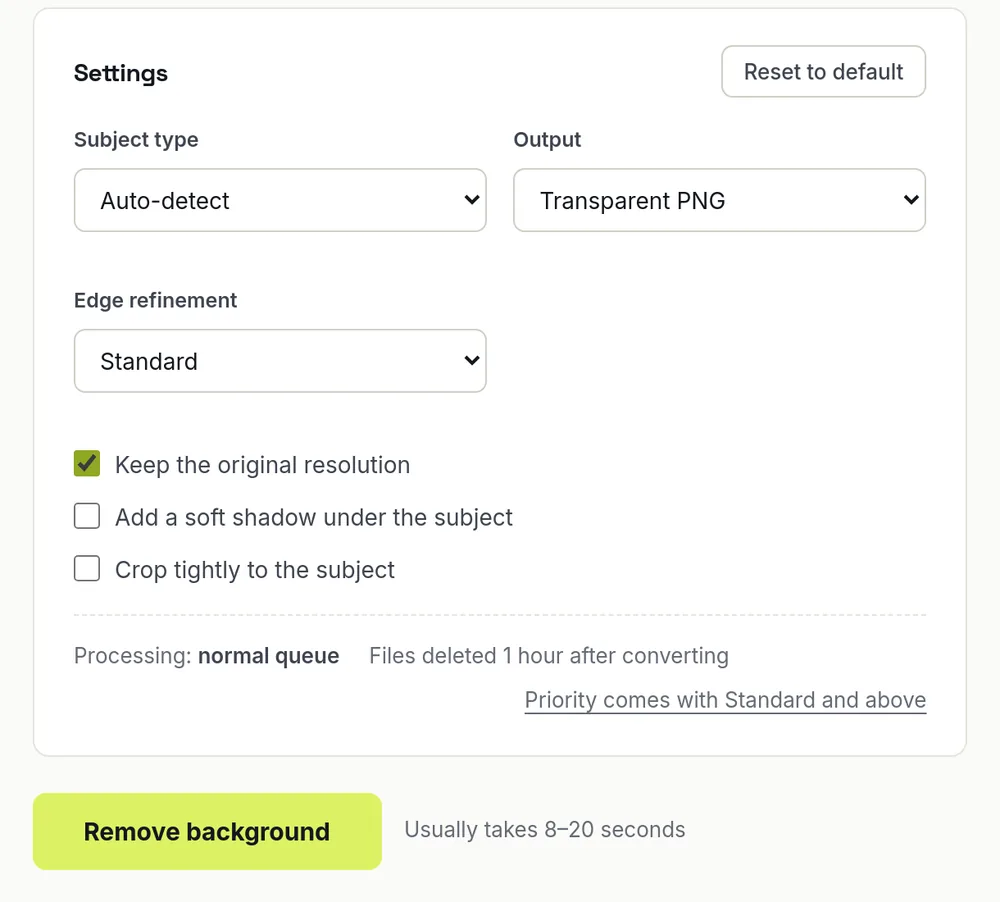
Steps 2 and 3: Output on Transparent PNG, then pick the edge setting.
That last step is where a surprising number of people lose the transparency they just made.
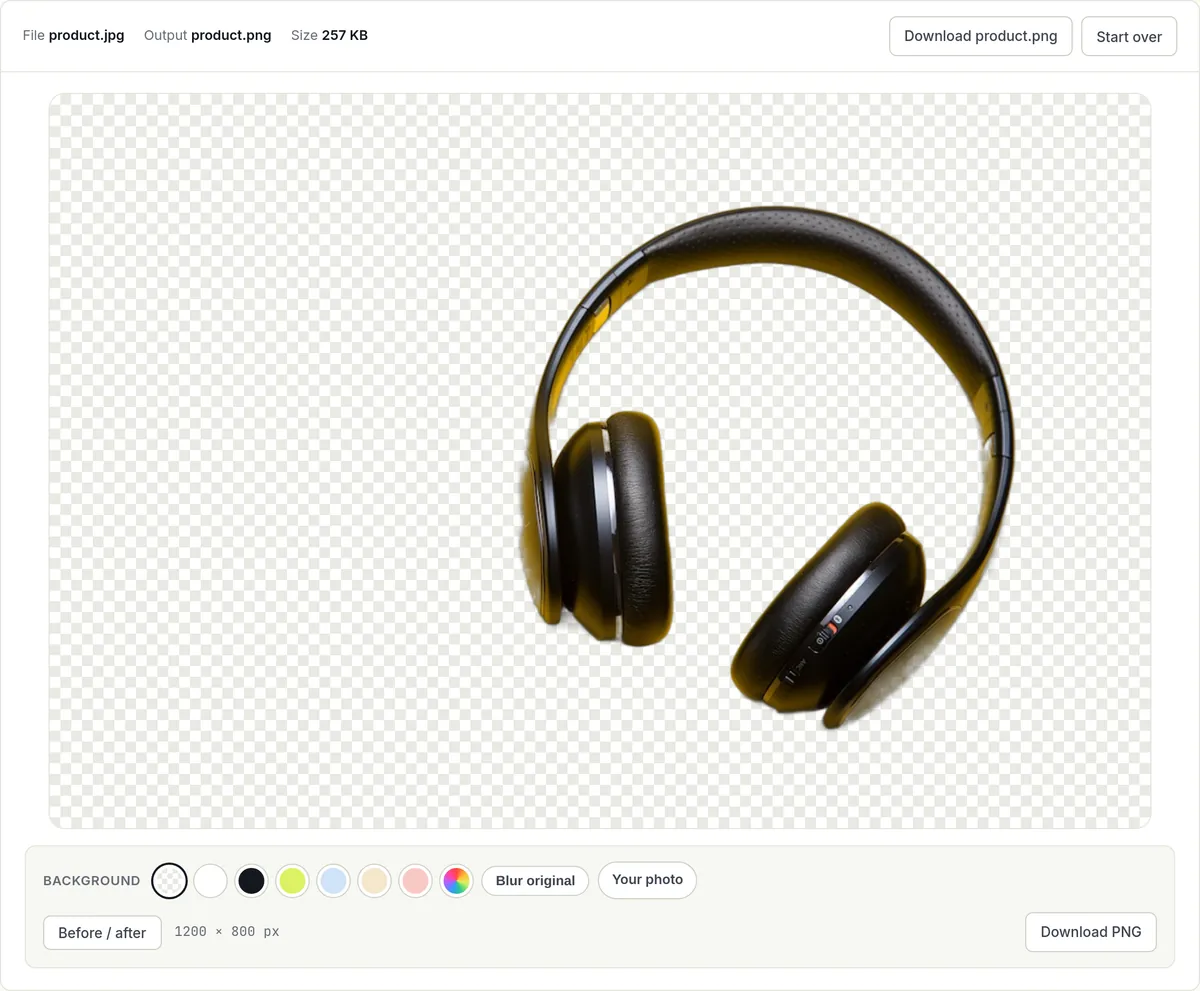
Step 5: Download PNG saves the real transparent file. The checkerboard is only the preview.
Which file formats keep a transparent background?
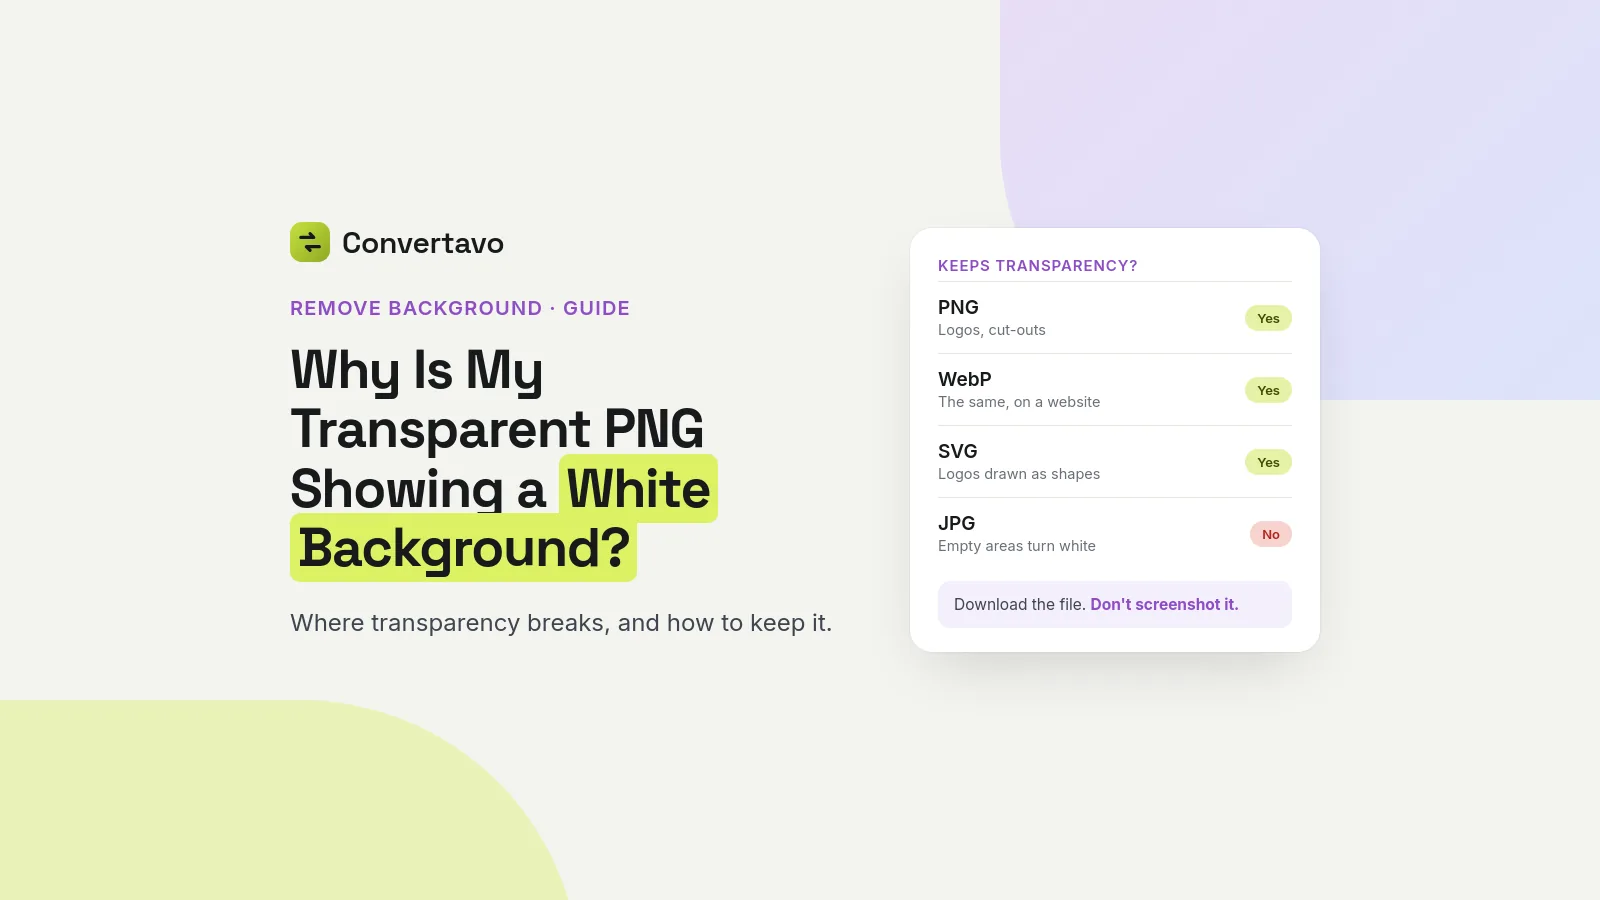
PNG, WebP and SVG keep it. JPG cannot, and that is the reason behind most white boxes.
A PNG carries an extra channel, called alpha, that stores how see-through each pixel is. A JPG has no such channel at all. So the moment a file is saved as JPG, every empty pixel has to become something, and that something is white.
Format | Keeps transparency | Best used for | Watch out for |
|---|---|---|---|
PNG | Yes, fully | Logos, cut-outs, anything placed on another image | Bigger file than a JPG |
WebP | Yes, fully | The same jobs, on a website | A few older apps still will not open it |
SVG | Yes, fully | Logos and icons drawn as shapes | Not suitable for photos |
JPG | No | Photos that already have a solid background | Empty areas turn white |
GIF | One level only | Simple flat graphics | Edges come out jagged |
Usually | Print files and documents | Depends on the app that made it | |
HEIC | Not accepted here | iPhone photos | Convert to JPG before uploading |
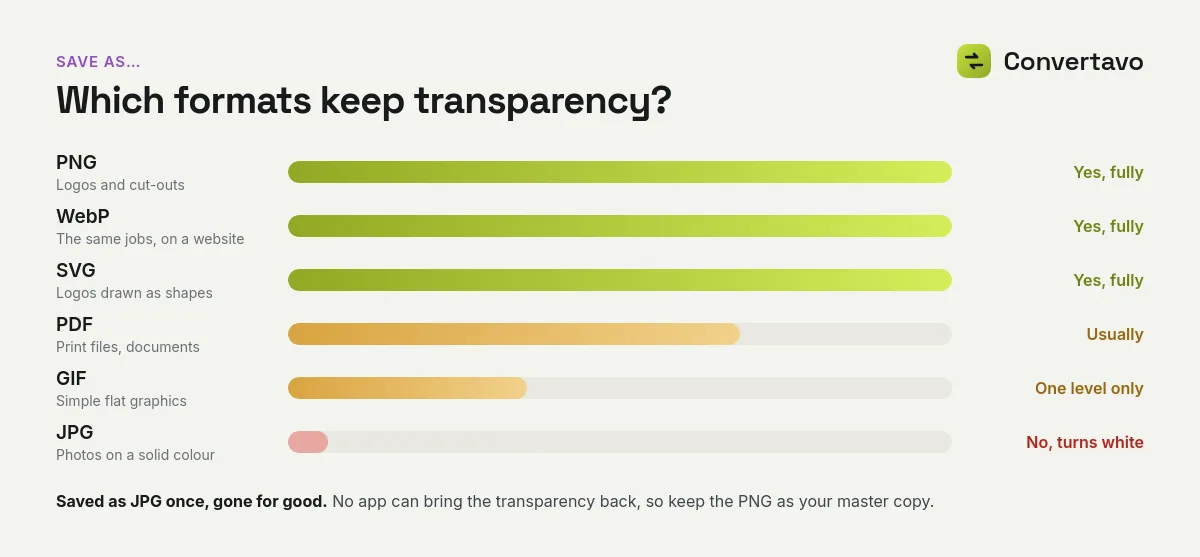
Save it as JPG once and the transparency is gone for good.
So a transparent PNG that you convert to JPG gets a solid white background, and no app can undo that. Keep the PNG as your master copy and make JPG versions from it.
Settings for the four jobs people ask about
The steps stay the same. Only the output and the edge setting change.
A transparent logo for a website header
Keep Output on Transparent PNG and set Edge refinement to Sharp, since a logo has straight lines. Save the PNG as your master file. A dark logo also needs a light version, so make one before your designer asks.
A product photo for Daraz, Amazon or eBay
These marketplaces want plain white, not transparency. Set Output to White background and Edge refinement to Sharp, then turn on the soft shadow so the product does not look like it is floating. Listings look best square, so finish in Crop Image at 1 to 1.
A signature or a stamp for a document
Photograph the signature on white paper in good light, then use Transparent PNG. Word and PowerPoint both keep the transparency when you insert a PNG. They lose it the moment you copy the picture out of a browser instead of inserting a saved file.
A person cut out for a poster or a thumbnail
Use Soft (hair and fur), because this is where hard tools fail. Loose strands are thin, and a rough edge around hair is the thing that makes a cut-out look fake to everyone who sees it.
Is it free, and what happens to my photo?
Yes it is free, and your photo is deleted an hour later. Here are the real numbers.
Free. You get 20 credits a day and each photo uses 10, so that is two cut-outs a day. No email address and no watermark. A free account raises it to 50 credits, which is five photos a day.
Limits. One JPG, PNG or WebP at a time, up to 25 MB. HEIC files from an iPhone are not accepted, so convert them first with HEIC to JPG.
Full size. Keep the original resolution is on by default. Switch it off and the cut-out is capped at 1500 pixels on its longest side, which is fine for the web and not for print.
Private. The upload travels over HTTPS and is deleted one hour after processing. Nothing is stored, read or reused.
Free to experiment. Trying different backdrops on the result screen happens in your browser, so swapping colours or blurring the original costs no extra credits.
The ten second test that tells you who broke it
Put the file on a dark background and look at it. That one check separates the three things people mix up, and it takes about ten seconds.
Make a black square in any app, drop your PNG on top of it, and look closely:
The whole picture sits in a white box. Nothing is wrong with your eyes, the app flattened the file. Something in the chain saved it as JPG.
A thin white or coloured line hugs the subject. The transparency survived. What you are seeing is fringing, a ring of the old background that came along with the edge.
Hair looks like a cardboard cut-out. The transparency is fine and the edge setting was too blunt for fine strands.
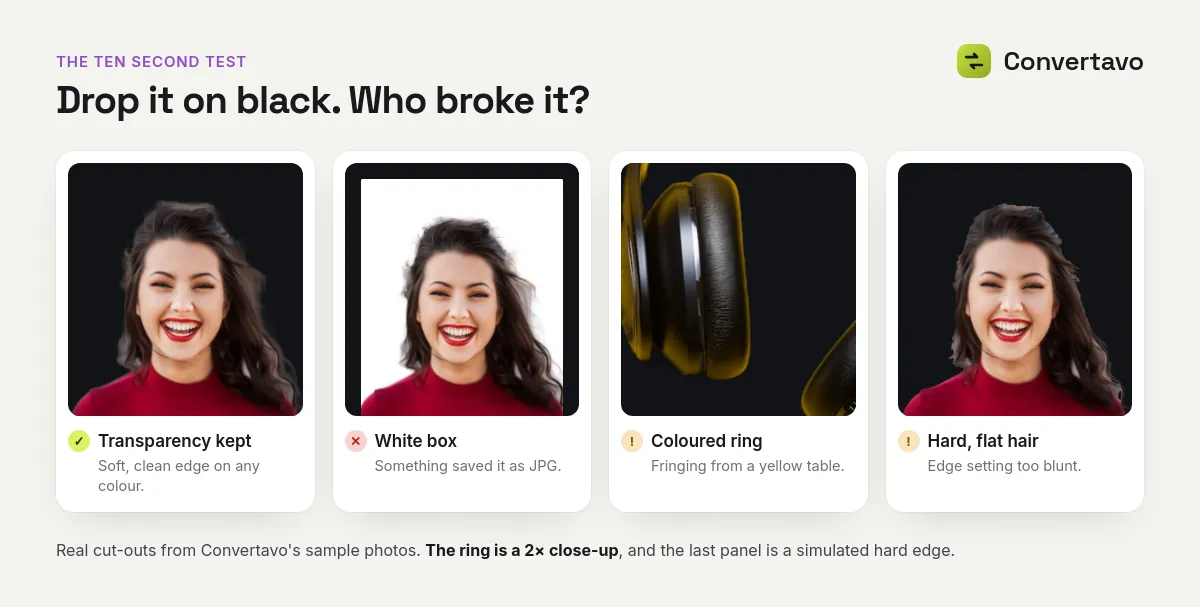
The same check, four different answers. Only the first one is a finished file.
Most guides treat all three as one problem, which is why the fixes people find online do not work.
What each edge setting actually costs you
Convertavo timed all three on the same 1200 by 1800 portrait.
Edge setting | Best for | Time on that portrait |
|---|---|---|
Standard | Most photos, and the quickest option | 5.4 seconds |
Sharp (products) | Boxes, bottles, electronics, logos | 11.4 seconds |
Soft (hair and fur) | People and pets with loose strands | 14.1 seconds |
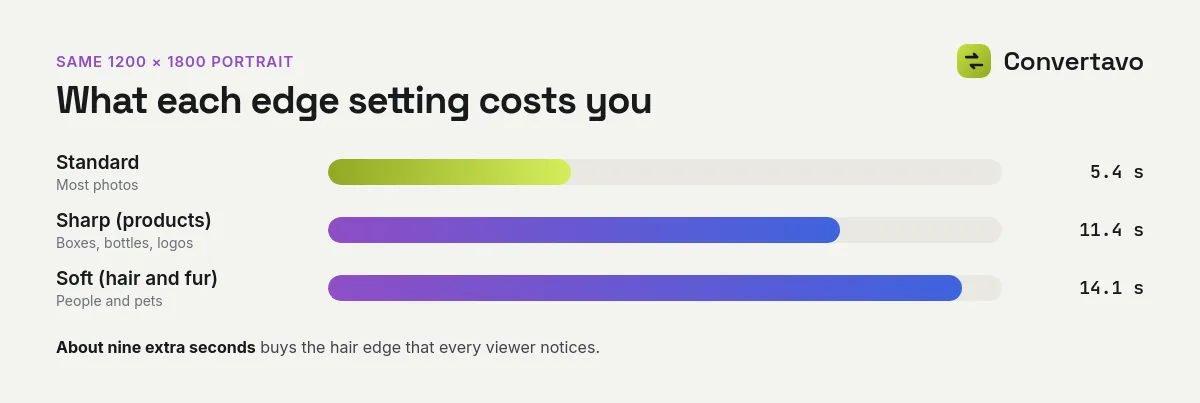
Standard is the quickest. Soft takes the longest and keeps the strands.
So the careful setting costs you about nine extra seconds. That is a small price for the one thing viewers always notice.
The fringing rule nobody writes down
Every cut-out keeps a thin ring of whatever was behind the subject. In Convertavo's own product test, headphones shot on a bright yellow table still showed a little yellow in the shiny plastic after the cut-out. You can see it in the third panel of the test above.
So the background colour of your photo matters even though you are deleting it. Shoot on a pale, plain surface that still contrasts with the subject. A dark coat against a pale wall cuts cleanly. A beige jumper against a beige sofa does not.
And if you are placing the cut-out on a dark design, check the edge at 100% zoom before you send it. White fringing is invisible on a white page and obvious on a black one.
Why does my cut-out still look wrong?
Nearly every case is one of these nine. Find yours and the fix is one setting away.
What you are seeing | Why it happens | What to do |
|---|---|---|
A white box in Word or PowerPoint | You copied the picture out of a browser instead of inserting a saved file | Save the PNG first, then use Insert Picture |
Transparency gone after a chat app | Chat apps re-save photos as JPG to make them smaller | Send it as a file or document, not as a photo |
White background after Save as JPG | JPG has no transparency channel at all | Keep the PNG as your master copy |
A marketplace rejected your transparent PNG | Most of them want solid white, not transparency | Set Output to White background and add the shadow |
Hair looks chopped off | The edge setting was too blunt | Run it again with Soft (hair and fur) |
A coloured line around the subject | A ring of the old background came with the edge | Reshoot on a pale plain surface, or try Sharp |
The cut-out is smaller than the photo | Crop tightly to the subject was switched on | Turn that option off |
The result came back at 1500 pixels | Keep the original resolution was switched off | Switch it back on, since it is on by default |
An iPhone photo was refused | HEIC files are not accepted here | Convert it first with HEIC to JPG |
One more that is not a fault. A transparent PNG is heavier than a JPG, so a page full of them loads slowly. For a website, put the subject on white and run it through Compress Image or PNG to JPG.
Other free tools for the same job
Crop Image makes the cut-out square, which is what most shop listings want.
Resize Image sets the exact pixel width a marketplace asks for.
PNG to JPG flattens a finished picture onto white when a form will not take a PNG.
Make one clean cut-out now
Take the photo that gave you the white box and remove the background from the image with Output on Transparent PNG. Download the file rather than screenshotting it, then drop it on a black square and check the edge. Two free cut-outs a day, with no account.
Frequently asked questions
Why is my transparent PNG showing a white background?
Something in the chain saved it as JPG, and JPG cannot store transparency. The empty pixels have to become a colour, and that colour is white. Check the file still ends in .png.
Does JPG support a transparent background?
No, and no setting changes that. If you need transparency, use PNG or WebP. SVG works too for logos drawn as shapes.
How do I keep the transparency when I send the file to someone?
Send it as a file or an attachment, never as a photo in a chat. Chat apps re-save photos to make them smaller, and that re-save is what flattens your image.
Why does my logo have a white box in PowerPoint?
Because the picture was copied out of a browser rather than inserted from a saved file. Save the PNG to your computer, then use Insert Picture.
Can I remove the background from a photo on my phone?
Yes. It runs in any modern browser on Android and iOS, and there is nothing to install. iPhone photos in HEIC format need converting to JPG first.
Is the background remover free?
Yes. You get 20 credits a day and a photo uses 10, so that is two cut-outs daily with no signup and no watermark.
Why is there a thin coloured line around my subject?
That is fringing, a ring of the old background that came along with the edge. It shows up most when the background colour was strong, so a pale plain surface gives a cleaner result.
Try it on your own file
Free, no signup, and your file is deleted an hour later.
Noman Mustafa — Founder of Convertavo I build the file tools on this site. Fifteen years of writing software, and most of my days now go into making PDF, image and OCR processing fast enough to run in a browser tab. I write here about what I learn breaking files apart.